DIY Felt Pumpkins
DIY FELT PUMPKINS
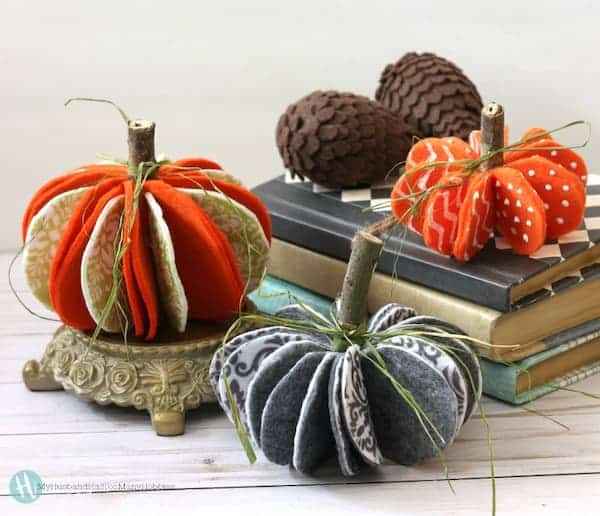
Not quite ready to visit the pumpkin patch yet? We weren’t either, so we crafted a few of our own. These adorable felt pumpkins are so easy and inexpensive to make and can be displayed all season long!
Instructions:
I found a stick in the yard and cut it into three pieces to use for the stems. The pumpkin template was found on-line and I used it for two of the pumpkins, although for the 2nd pumpkin, I trimmed it down slightly to give it a different shape and size. The smallest pumpkin was made with a template I drew by hand. Cut out the pumpkin shape and then fold or cut the template in half.
Fold the felt and pin the template to the felt on the fold line. I cut 8 pieces because this felt was pretty thick. Note: You may need more or less pieces depending on the size of the stick you use or the thickness of felt you are using.
Apply a line of hot melt glue on the fold line and attach the felt pieces to the stick, working your way around the stick.
You can leave it as is, or do what we did and cut slightly smaller pieces using patterned felt. Just be aware that the pattern is only printed on one side. Fold in half and glue closed so that the pattern is on the outside. Attach to the stick in between the other pieces using the same technique with the hot melt glue.
I had more patterned felt and decided to make another pumpkin with it. The felt was thinner than the orange felt I used for the first pumpkin, so I cut out 10 pieces of the patterned felt and 10 pieces of gray felt and glued them together. I then folded them in half and attached to the stick the same way.
GET CREATIVE & ADD YOUR OWN PATTERN
For the small pumpkin, I made my own pattern and cut out 24 halves. I used puffy paint to draw patterns on the felt, then I glued two halves together with the hot melt glue keeping the painted pattern on the outside. These were then glued to the stick stem.
I was pleased with how well these turned out! They are all cute, but I’m partial to the gray and white one. I’m thinking the smaller one would be a beautiful accent on a Thanksgiving table. Couldn’t you just image these sitting on each place setting?
To finish them off, I tied a piece of green raffia ribbon around the stems.
Thank you for sharing!